
The MAXScript Online Help provides an advanced example of using the PArray to generate debris then animated by PFlow.
The 3dsmax Online Tutorials also provide an example of a chunky explosion.
The simple tutorial provides the basics of setting up an explosion to chunks using a Scripted Birth Event.
It does not provide any information about the origin of the chunks (we will use simple boxes building a larger box),
but the technique applies to any situation where the chunks are already existing and require only animation through PFlow...
On a side note, a similar but much more complex setup was used by Frantic Films to animate the hundreds of frozen
Tar Monster chunks seen in the new Scooby Doo 2 movie in theatres since March 26th 2004.
Click here to download the MAX Scene (55K, 3dsmax 5.1 with PFlow, 3dsmax 6 or higher)
| Natural Language - Setup |
-
Create an array of 4x4x4 boxes building a larger box. We can assume the large box was "shattered" into the smaller ones. ("Resistance is futile!")
-
This will give you 64 objects named Box01 thru Box64.
-
Go to Hieararchy tab > Affect Pivot Only, select all Boxes and press Center Pivot to align the Pivot Point.
-
Go to Utility tab > Reset XForm and reset the transformation of all 64 boxes.
-
Right-click and Collapse to Editable Mesh
-
Hide all 64 boxes
-
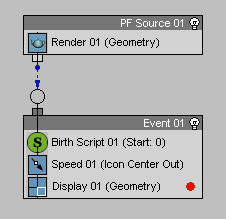
Create a Particle Flow with Birth Script operator generating as many particles as chunks in the scene. Use the script below.
-
Use Speed operator to accelerate the particles out of the icon's center (the PF icon will be placed at the center of explosion)
-
Set the Display to Geometry
| Particle View Setup |
| Script |
on ChannelsUsed pCont do
(
pCont.useAge = true
pCont.useTM = true
pCont.useShape = true
)
on Init pCont do
(
global ChunksArray = $Box* as array
)
on Proceed pCont do
(
t = pCont.getTimeStart() as float
if t < color="#0000ff"> do
(
NumChunks = ChunksArray.count
for i = 1 to NumChunks do
(
pCont.AddParticle()
pCont.particleIndex = pCont.NumParticles()
pCont.particleAge = 0
pCont.particleTM = ChunksArray[i].transform
pCont.particleShape = ChunksArray[i].mesh
)
)
)
on Release pCont do
(
)
| Results |
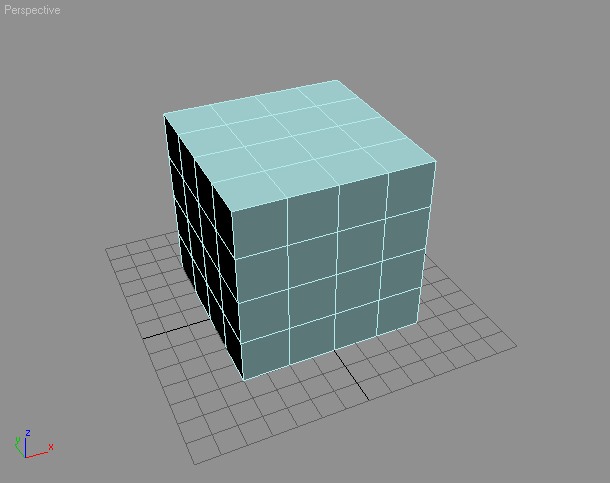
This is the array of boxes building a larger box
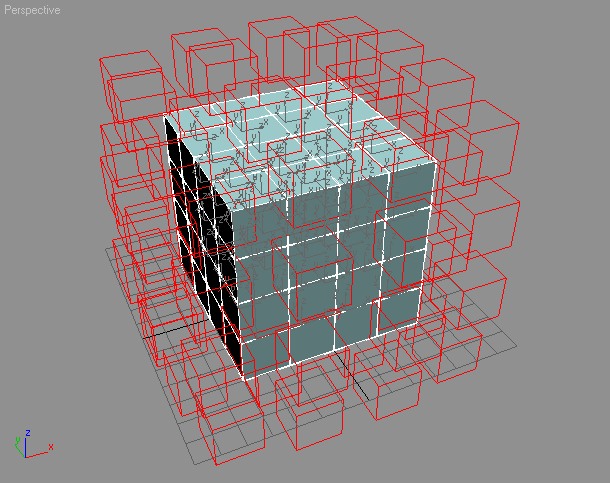
This is the array of boxes in "shade selected" mode AND the particles as wireframe on frame 10
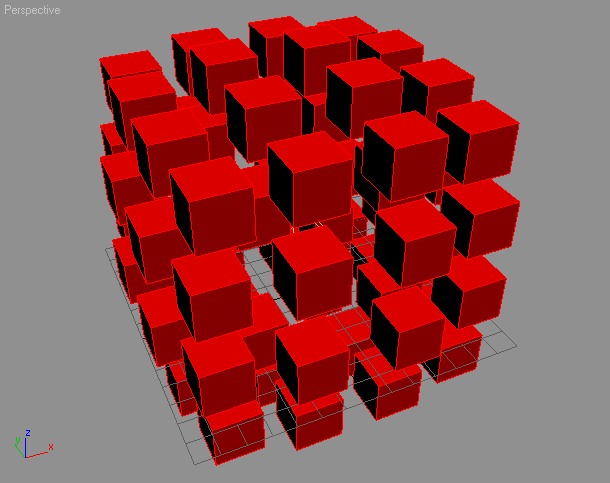
These are the particles in shaded mode on frame 10.
![]()
They are moving away from the center of the explosion defined by the position of the PF icon.
| Step-By-Step Comments |
on ChannelsUsed pCont do
(
The ChannelsUsed handler defines the channels to be used by the Script Operator - you cannot get or set particle related values from the particle container without specifying which properties you need access to. This way, Particle Flow does not have to provide the Script Operator with all possible channels (and there can be an arbitrary number of channels in Particle Flow) but only with those that are actually needed. This conserves memory!
The parameter pCont contains the Particle Container.
pCont.useAge = true
Because we are going to create new particles in the Birth Script, we will have to access their Age property to set it to 0.
pCont.useTM = true
We will need to copy the complete transformation matrix from the chunks in the scene into the particles in the flow.
pCont.useShape = true
We will also copy the mesh of the particles into the shape property of the particles.
)
on Init pCont do
(
The Init handler is used to initialize the Birth Script Operator.
The parameter pCont contains the Particle Container.
global ChunksArray = $Box* as array
In this case, we define a global variable containing an array listing the scene objects to be used as sources for the chunks.
NOTE that it is a good idea to give both the variable and the scene objects rather unique names to avoid conflicts. In this case though, we are using some simple names...
)
on Proceed pCont do
(
The Proceed handler is called every time the Script Operator is evaluated by Particle Flow.
It contains the actual body of the script.
The parameter pCont contains the Particle Container which contains all particles the Operator is applied to.
t = pCont.getTimeStart() as float
This variable will contain the start time of the evaluation.
if t < color="#0000ff">do
(
The start interval will be negative on frame 0 and below. You should not alow negative frames in your scene anyway,
so the following code will be evaluated only of frame 0
NumChunks = ChunksArray.count
This variable will contain the number of scene objects in the array to be turned into particles.
for i = 1 to NumChunks do
(
Now we will create as many particles as objects in the array. The variable i will contain the index of the particle
pCont.AddParticle()
We add a new particle to the container, basically giving it birth!
pCont.particleIndex = pCont.NumParticles()
We read the count of particles in the container and assign to the particleIndex property of the container,
thus making the last created particle the current one!
pCont.particleAge = 0
We set the age of the particle to 0 in case future events would ask for it...
pCont.particleTM = ChunksArray[i].transform
But the important part is to "steal" the whole transformation matrix of the scene object the particle references -
this basically places the particle at the same position as the scene object and also aligns orientation and inherits scaling...
pCont.particleShape = ChunksArray[i].mesh
Finally, we snapshot the mesh from the top of the stack of the scene object and assign to the Shape of the particle.
At this point, the particle looks like the scene object and also occupies the same position in space!
)
)
)
on Release pCont do
(
)


